Paper Blooms Card Tutorial - Introducing the “Mini Boss”
Paper Blooms Card Tutorial
February is the last month of Sale-a-Bration, it's shorter this year, so don't let the time slip by!
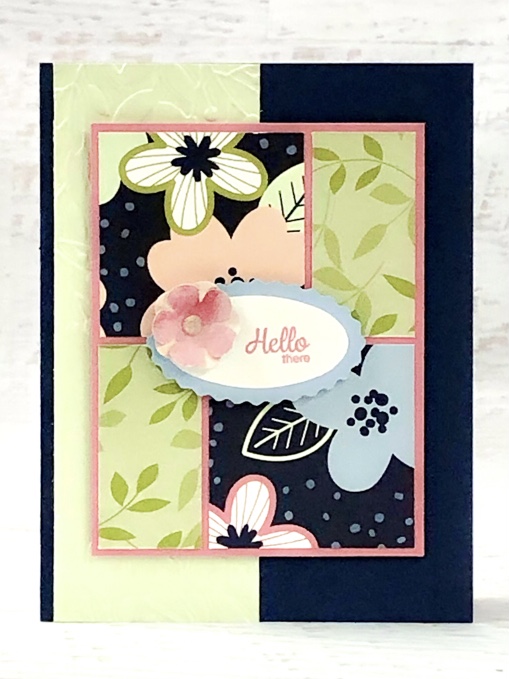
This month's tutorial is so pretty! It features two techniques (Color Blocking & Embossing) and the Paper Blooms Designer Series Paper that you can earn as a reward only during Sale-a-Bration. I think you will love it!
This card features the Colour Blocking Technique and embossing using the the Mini Stampin' Cut & Emboss Machine. I love this adorable new tool and think it is something every crafter can enjoy. I decided to call my machine the “Mini Boss”.
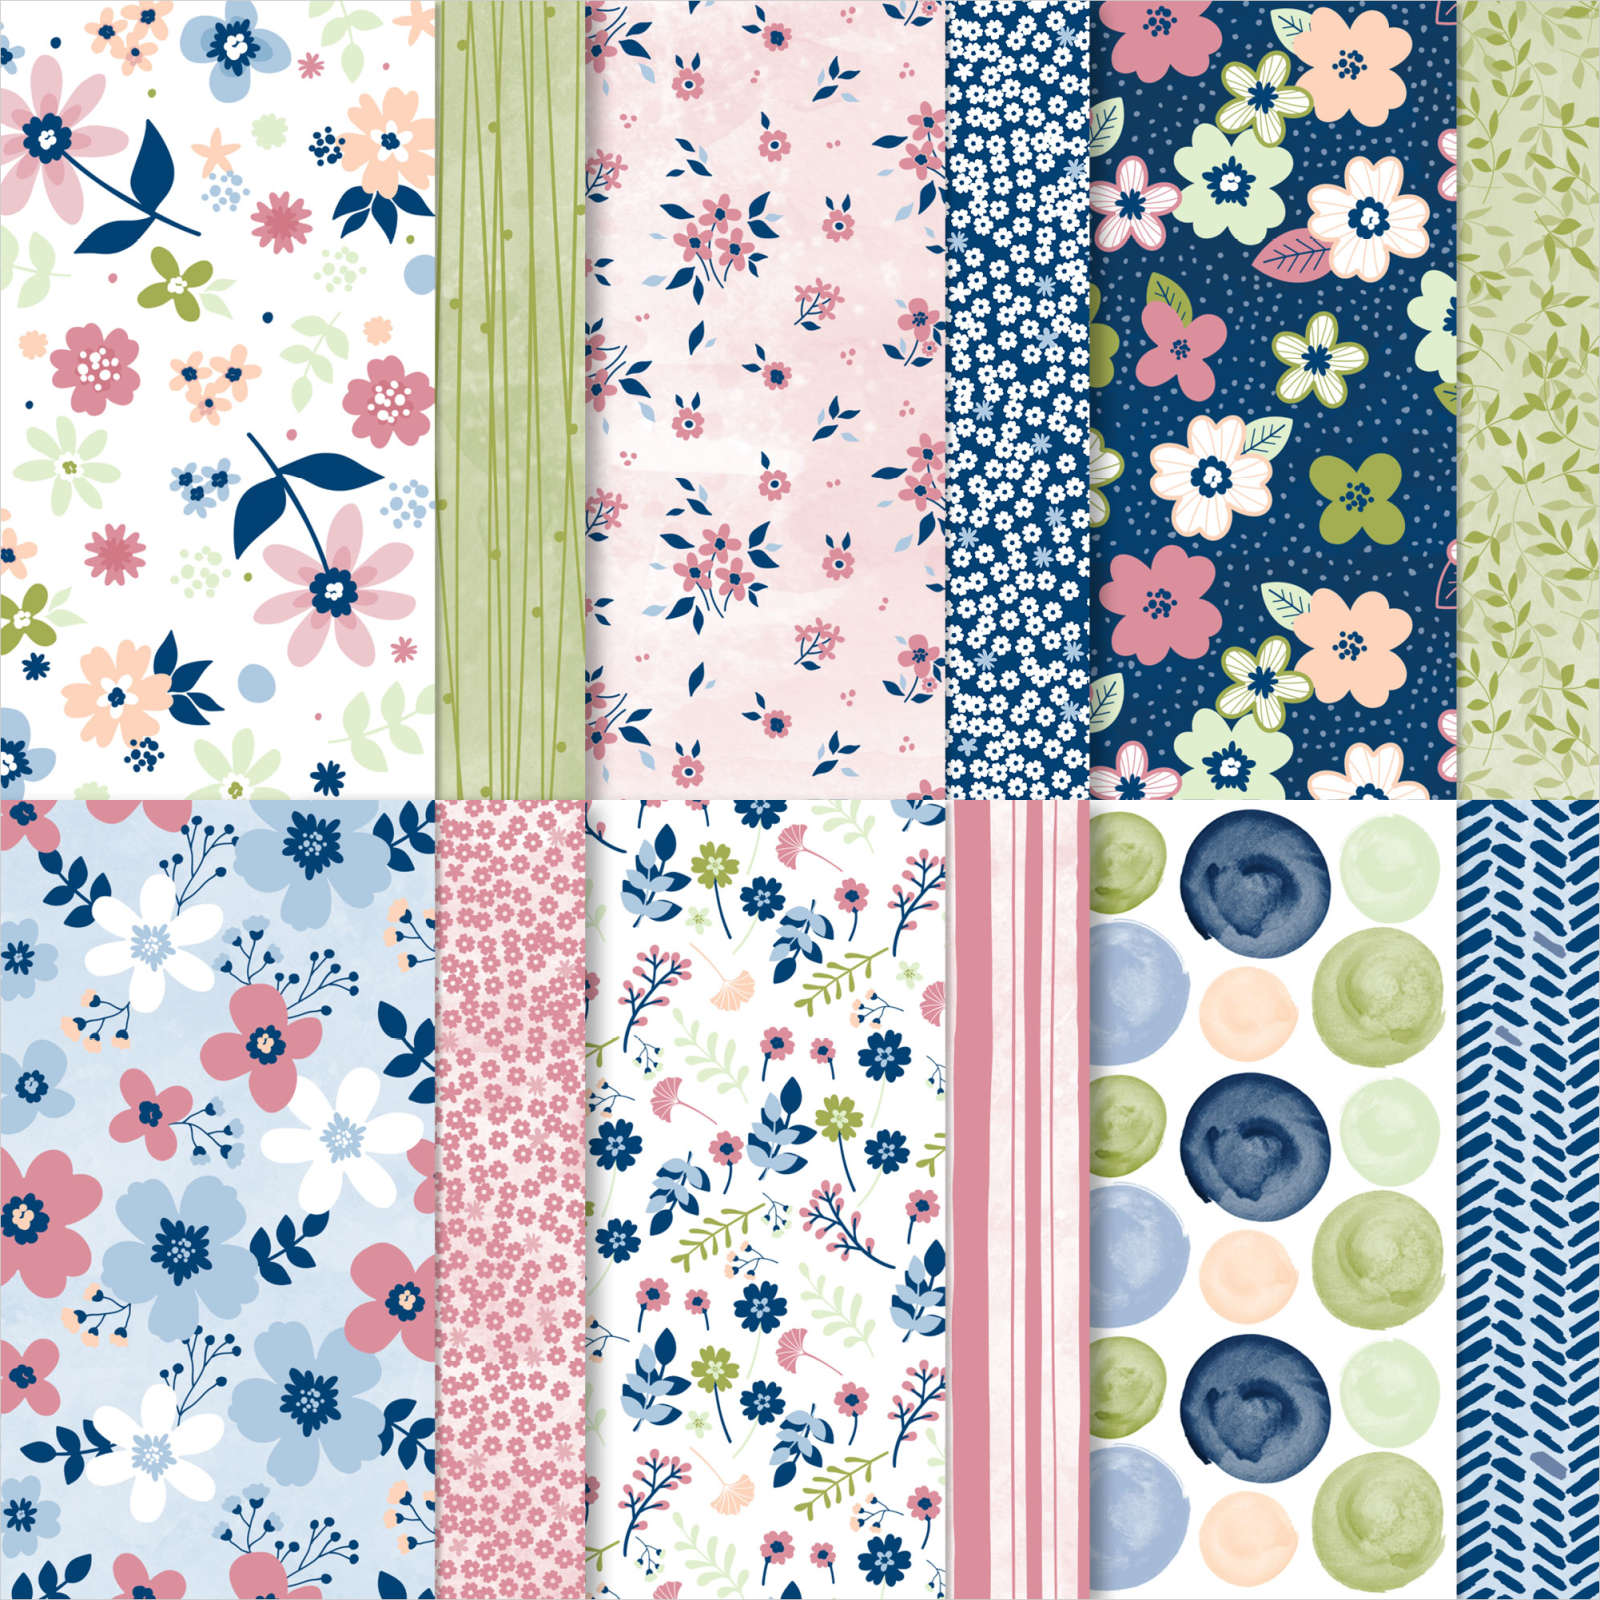
The soft and bold colour combination in this card is perfect for Spring. The colours are inspired by the Paper Blooms Designer Series Paper, which is one of the reward items you can earn during Sale-a-Bration, but only through the end of February!
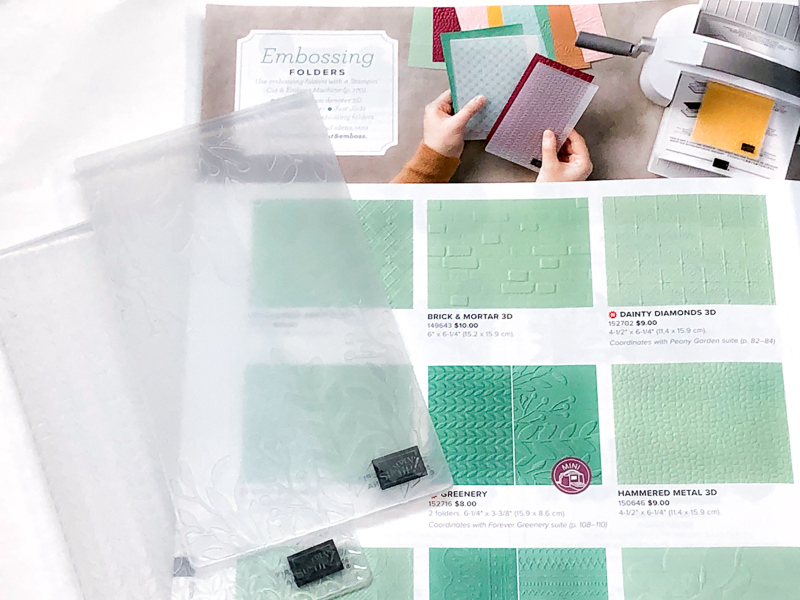
1. Mini Stampin’ Cut & Emboss
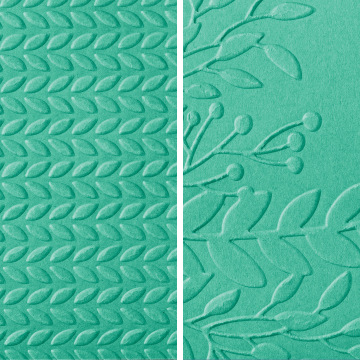
The Mini Stampin' Cut & Emboss Machine works with dies that measure 3-1/4" x 6-1/2" and smaller and the small embossing folders (3D and regular). This card uses the leafy design from the Greenery Embossing Folders set (#152716). 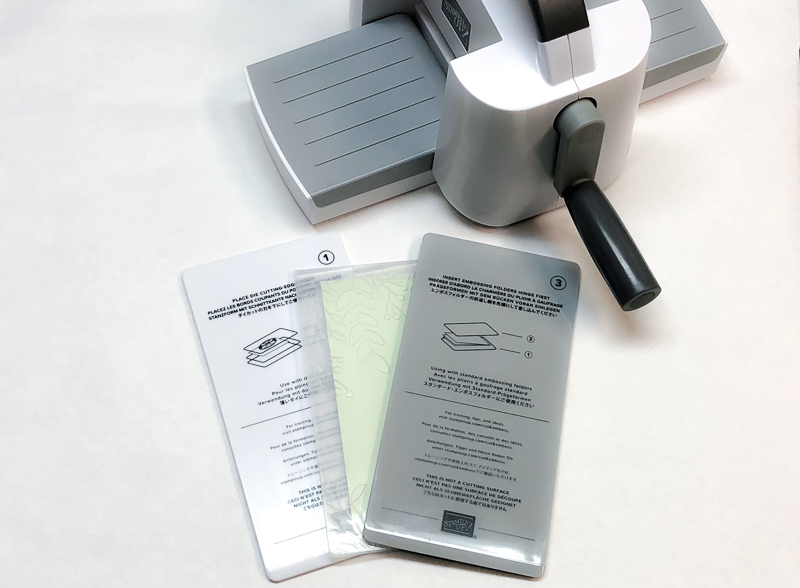
2. Embossing Sandwich
Place a 2” x 5-1/2” piece of Soft Sea Foam cardstock in the small embossing folder. The correct layering sandwich is written in the plates. Look for the plate labeled Embossing Folder (Plate 3). Layer the folder between Plate 1 and Plate 3 as shown. Plate 4 is used with the thicker 3D embossing folders.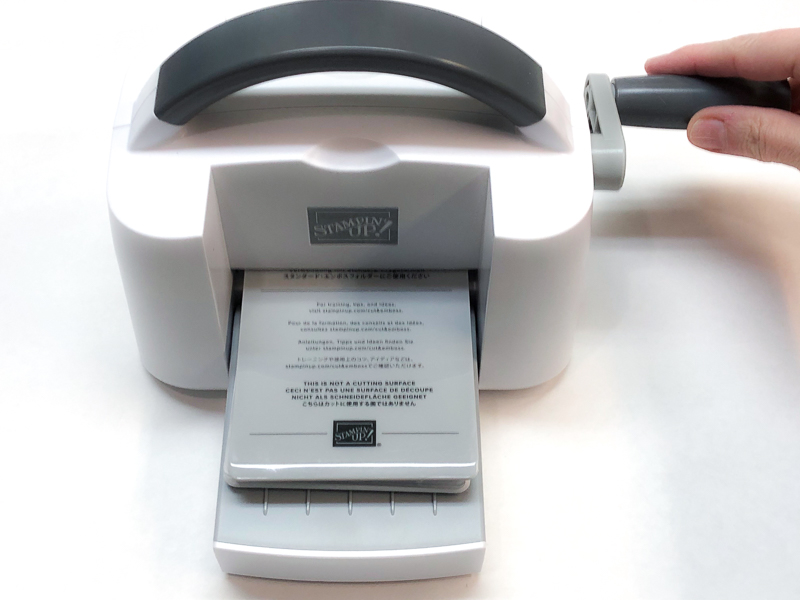
3. Emboss
Place the sandwich into the Mini Machine with the hinged side of the embossing folder going in first. If the rollers don’t grab the sandwich easily, stagger the plates slightly front to back. Crank through while holding the top handle.
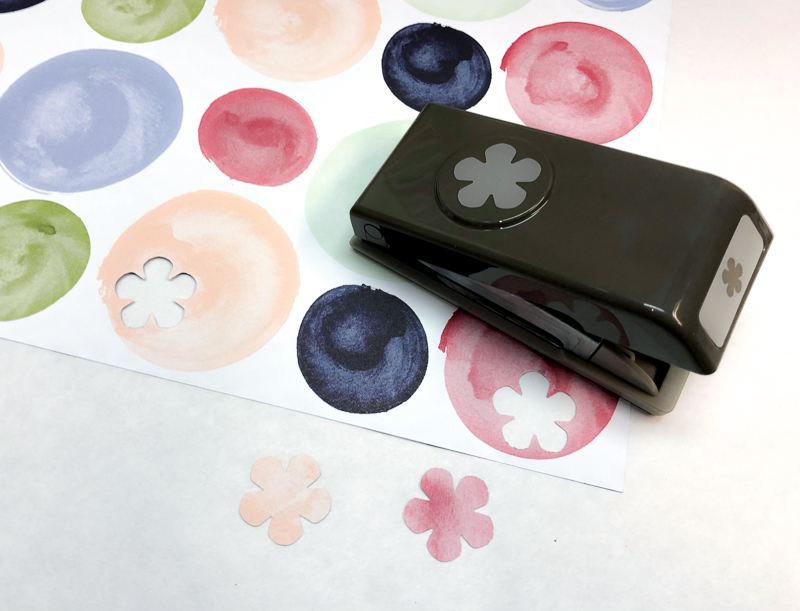
4. Punch Flowers
Use the Small Bloom Punch (#152316) to punch the Paper Blooms paper with the circles on it. Punch one bloom each of Rococo Rose and Petal Pink.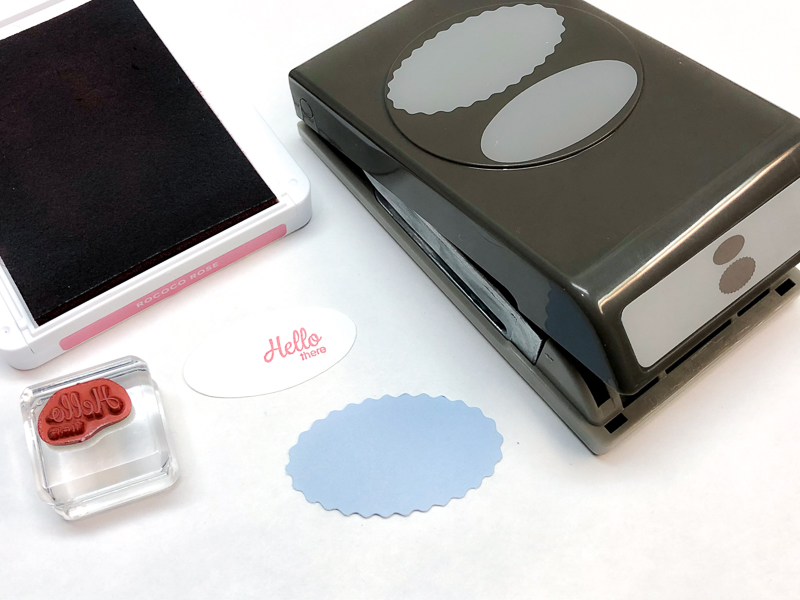
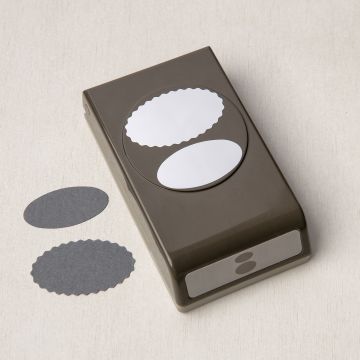
5. Stamp & Punch
Stamp greeting from Here’s a Card stamp set (#149438) on Basic White cardstock. Punch greeting with smaller Double Oval Punch (#154242) so it is off-center with the greeting near the right edge. Punch scrap Seaside Spray cardstock with the scalloped oval from the Double Oval Punch.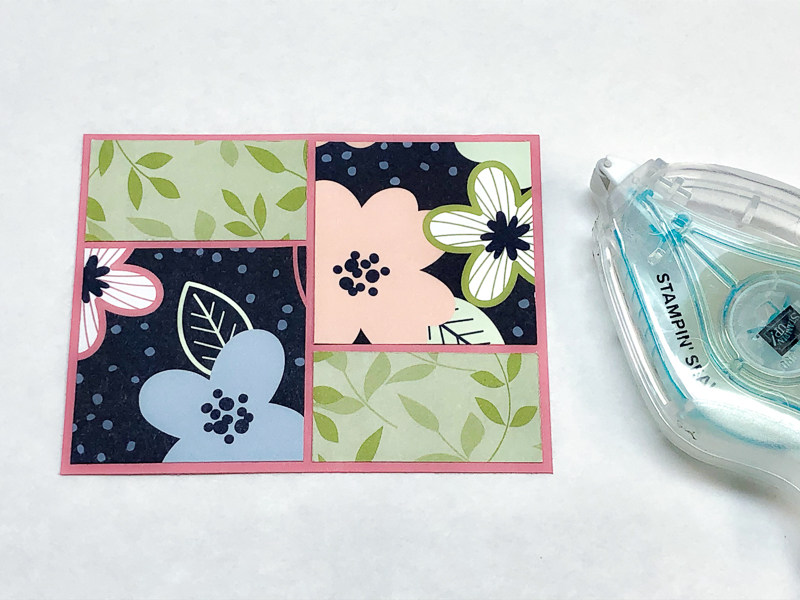
6. Colour Blocks
Use Paper Blooms Designer Series Paper to create a colour blocked design. Cut two 2” x 2” and two 1” x 2” pieces from the same paper. Cut Rococo Rose cardstock to 3-1/4” x 4-1/4” and adhere the pattered paper as shown.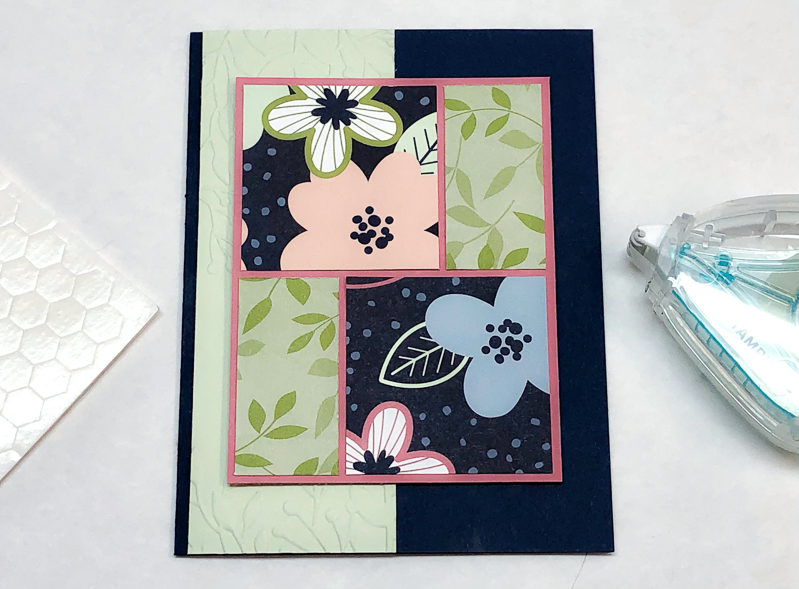 7. Create Card
Cut Night of Navy cardstock to 5-1/2” x 8-1/2”. Score at 4-1/4” on the 8-1/2” side. Adhere 4” x 5-1/4” Basic White cardstock inside card. Adhere embossed strip 1/8” from left edge. Adhere Colour Block layer centered on card front with Stampin’ Dimensionals.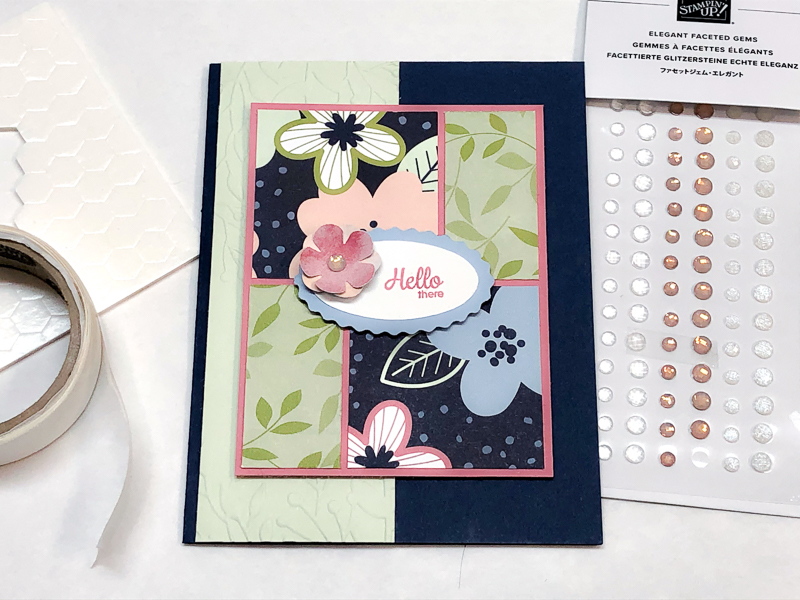
8. Finish Card
Layer punched ovals with Stampin’ SEAL. Adhere to card front with Stampin’ Dimensionals. Stack punched flowers with Glue Dots. Use a Bone Folder to curve flower petals. Add to greeting oval with Glue Dots. Add an Elegant Faceted Gem (#152464) to the flower center.SUPPLIES:
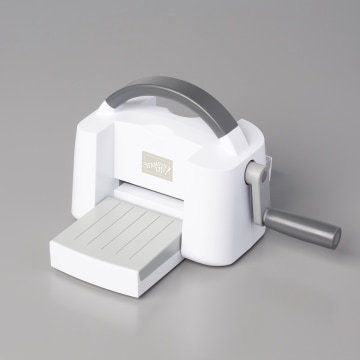
The new Mini Cut & Emboss Machine is now available! This little cutie is perfect for having at your desk or taking with you to crafting events. With it's low price it is the ideal tool for new crafters to get started with die cutting and embossing. Avid crafters will love the convenience of having a cutting and embossing tool right at their finger tips, without loosing valuable crafting space. One of the cool things about the Mini Machine is that the platform folds up so that it stores away easily and does not take up much space on your table.
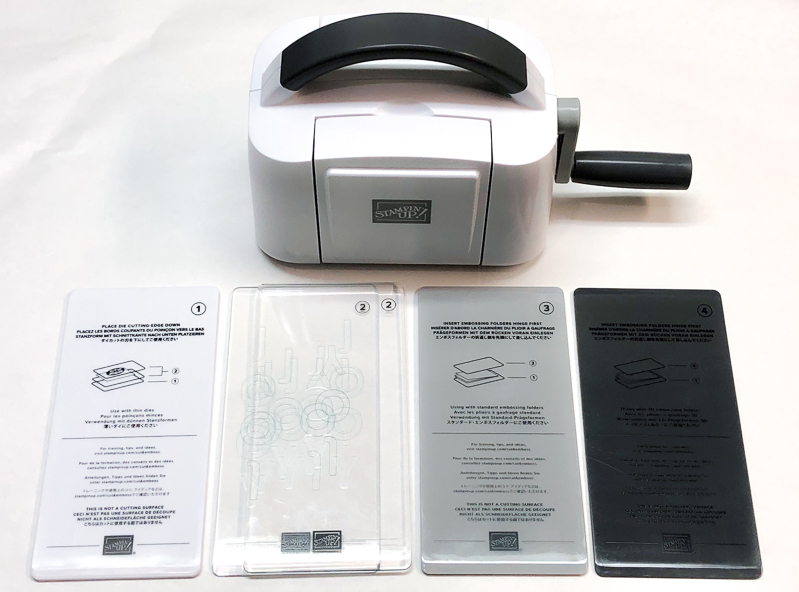
The Mini Machine comes with 5 plates (One each of plates 1, 3, 4 and two of cutting plates labeled plate 2). To make it super-easy to use, each plate is clearly labeled with written and picture directions for the correct sandwich needed for die cutting, embossing, or embossing the 3D folders.
The Mini Machine works with dies that measure 3-1/4" x 6-1/2" and smaller and the small embossing folders (3D and regular).
Purple circle icons with the MINI label clearly indicate which dies and embossing folders are compatible with the Mini Machine.
Plus, when you purchase your Mini Cut & Emboss Machine during Sale-a-Bration you will also earn a reward item, so treat yourself to this fun tool today!
SHOP NOW and earn Sale-a-Bration rewards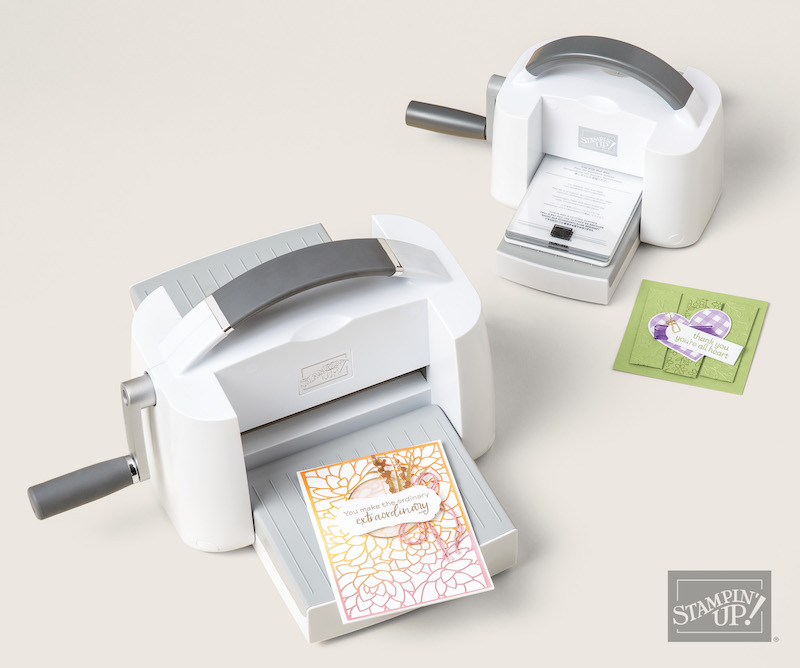
TAKE ME BACK TO THE TOP
Current Host Code
CLICK TO SHOP WITH HC

Free Newsletter!

Paper Pumpkin
SIGN ME UP!

Share With Friends
Most Recent Blog Posts
- FREE SHIPPING - DEC 14
- FREE SHIPPING from Oct 9th to 11th
- Stamp another Stack of Christmas Cards with Kevin & Christine
- Let the fun begin - again …
- Why wait? Join us now!
- Fitting Florets for any Occasion
- Festive Window Wishes
- Starter Kit + = No brainer!
- Perched in a Tree
- Awash in Beauty, so gorgeous!
.jpg)
.jpg)
.jpg)
.jpg)
.jpg)
.jpg)
.jpg)
.jpg)
.jpg)
.jpg)
.jpg)
.jpg)
.jpg)
.jpg)
.jpg)
.jpg)
.jpg)
.jpg)
.jpg)
.jpg)
.jpg)
.jpg)
.jpg)
.jpg)
.jpg)
.jpg)
.jpg)
.jpg)
.jpg)
.jpg)
.jpg)
.jpg)
.jpg)
.jpg)
.jpg)
.jpg)
.jpg)
.jpg)
.jpg)
.jpg)
.jpg)
.jpg)
.jpg)
.jpg)
.jpg)
.jpg)
.jpg)
.jpg)
.jpg)
.jpg)
.jpg)
.jpg)
.jpg)
.jpg)
.jpg)
.jpg)
.jpg)
.jpg)
.jpg)
.jpg)
.jpg)
.jpg)
.jpg)
.jpg)
.jpg)
.jpg)
.jpg)
.jpg)
.jpg)
.jpg)
.jpg)
.jpg)
.jpg)
.jpg)
.jpg)
.jpg)
.jpg)
.jpg)
.jpg)
.jpg)
.jpg)
.jpg)
.jpg)
.jpg)
.jpg)
.jpg)
.jpg)
.jpg)
.jpg)
.jpg)
.jpg)
.jpg)
.jpg)
.jpg)
.jpg)
.jpg)
.jpg)
.jpg)
.jpg)
.jpg)
.jpg)
.jpg)
.jpg)
.jpg)
.jpg)
.jpg)
.jpg)
.jpg)
.jpg)
.jpg)
.jpg)
.jpg)
.jpg)
.jpg)
.jpg)
.jpg)
.jpg)
.jpg)
.jpg)
.jpg)
.jpg)
.jpg)
.jpg)
.jpg)
.jpg)
.jpg)
.jpg)
.jpg)
.jpg)
.jpg)
.jpg)
.jpg)
.jpg)
.jpg)
.jpg)
.jpg)
.jpg)
.jpg)
.jpg)
.jpg)
.jpg)
.jpg)
.jpg)
.jpg)
.jpg)
.jpg)
.jpg)
.jpg)
.jpg)
.jpg)
.jpg)
.jpg)
.jpg)
.jpg)
.jpg)
.jpg)
.jpg)
.jpg)
.jpg)
.jpg)
.jpg)
.jpg)
.jpg)
.jpg)
.jpg)
.jpg)
.jpg)
.jpg)
.jpg)
.jpg)
.jpg)
.jpg)
.jpg)
.jpg)
.jpg)
.jpg)
.jpg)
.jpg)
.jpg)
.jpg)
.jpg)
.jpg)
.jpg)
.jpg)
.jpg)
.jpg)
.jpg)
.jpg)
.jpg)
.jpg)
.jpg)
.jpg)
.jpg)
.jpg)
.jpg)
.jpg)
.jpg)
.jpg)
.jpg)
.jpg)
.jpg)
.jpg)
.jpg)
.jpg)
.jpg)
.jpg)
.jpg)