 Hi, I'm Christine Alward and welcome to my website. I have been a demonstrator with Stampin' Up! since December 2009, and I love paper crafting and card making.
 I love to make people feel good and happy about their accomplishments, big or small, and I can never get enough of the smiles and pride I see on my customers' faces when they look at a finished project.
So many have told me that they have no creativity or talent when it comes to crafting, and all I would ask them is to give it a try and let me prove them wrong. Watching happy clients of all ages leave my classes with their finished cards and projects is what I like best about my job as independent Stampin' Up! demonstrator. I hope you will find inspiration in the projects I present here and that you will join me in my studio for a class.

World of Good Masculine card - Free Tutorial
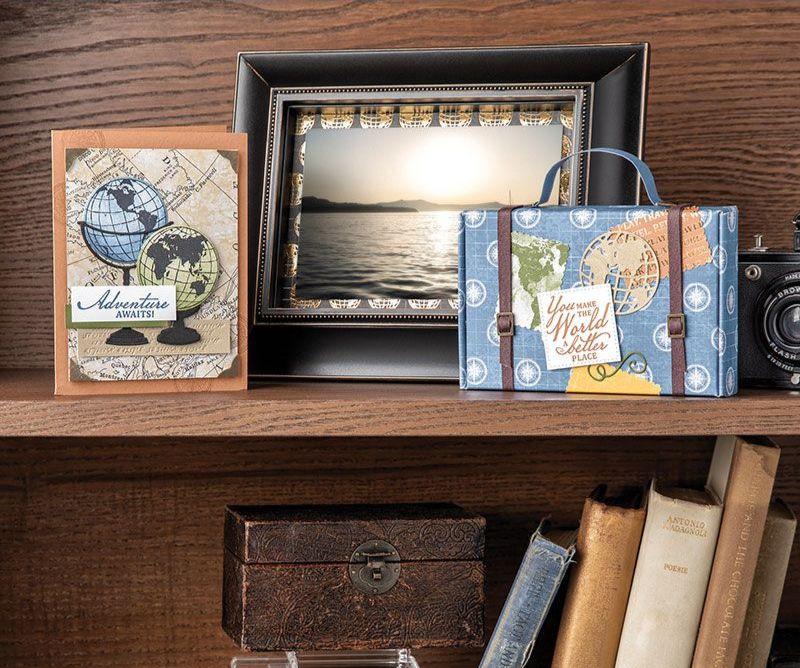
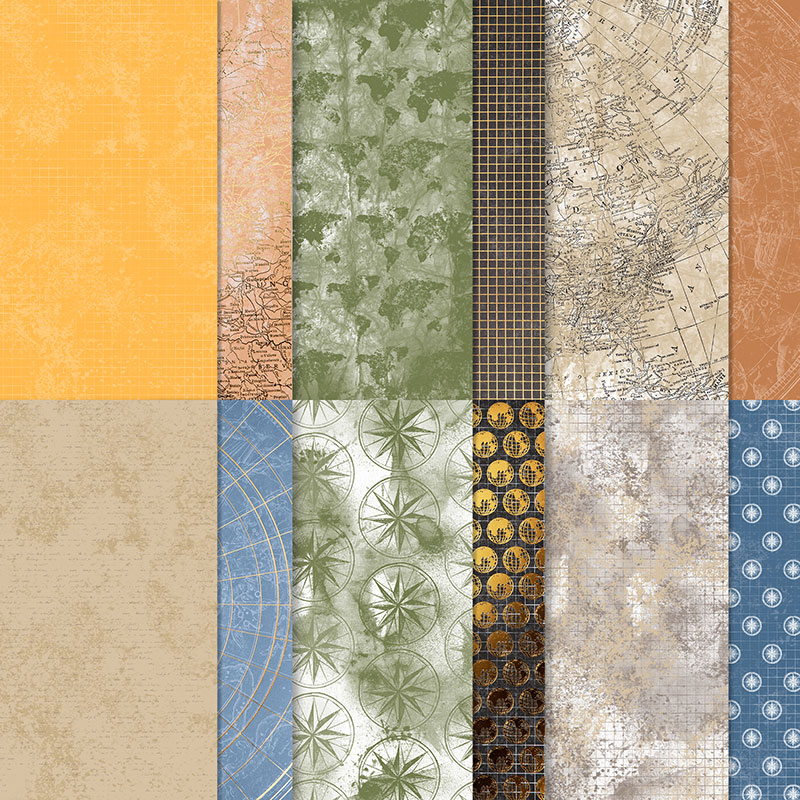
I thought it would be fun to explore the world of creativity available in the new catalogue with a tutorial featuring the World of Good Suite which is packed with rich colours, tons of texture, and old world charm. This card features several of the new In-Colors and is a great birthday or Father's Day card for the guys in your life. From masculine cards to travel memories this suite is sure to bring you lots of crafting adventures!

WORLD OF GOOD MASCULINE CARD
This card features the World of Good suite. This suite is packed with rich colours, tons of texture, and old world charm. From masculine cards to travel memories this suite is sure to bring you lots of crafting adventures!
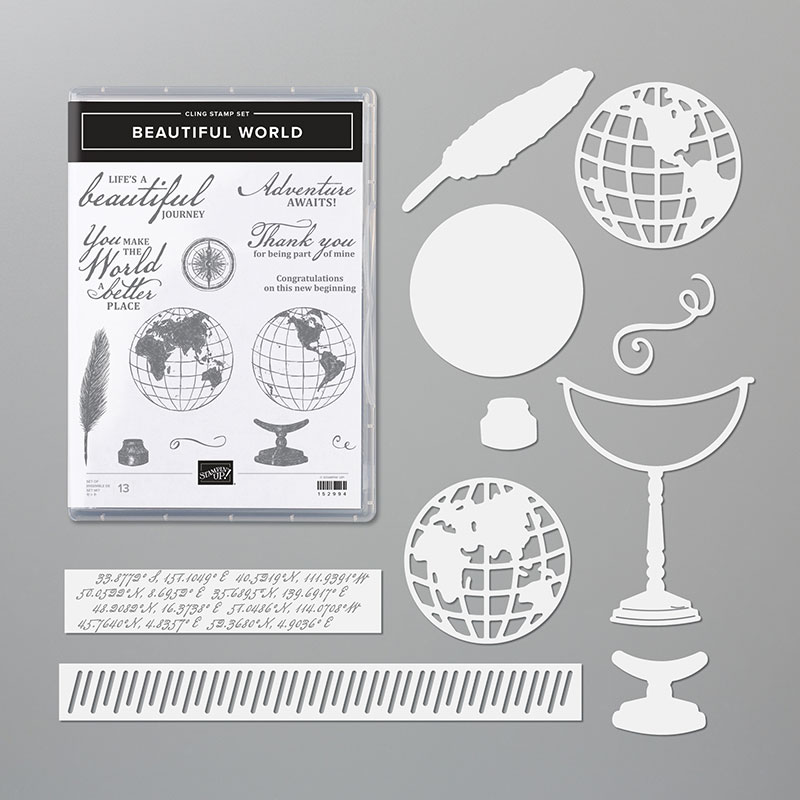
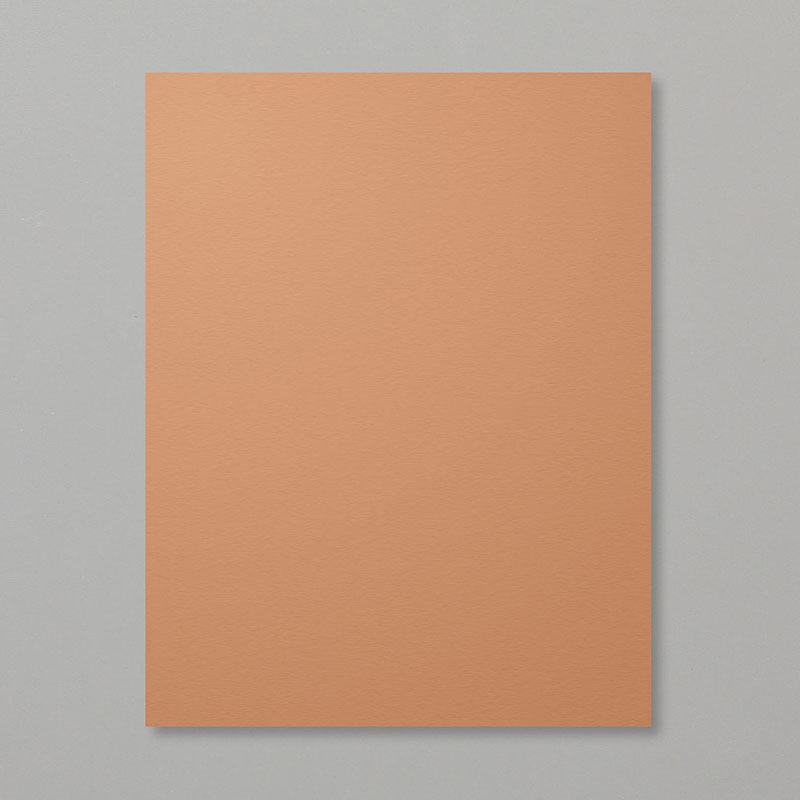
The Good World Suite features Cinnamon Cider, #3 of 2020-2022 In-Colors I am showing you in my tutorials. As you can see, it pairs well with black and Brass Foil.
Enjoy!
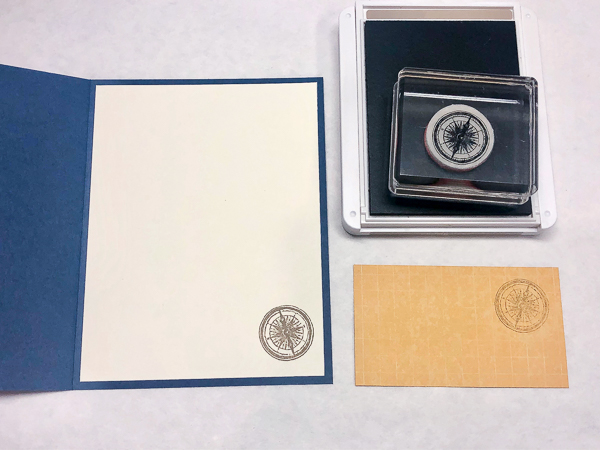 1. Cut, Score, Stamp
Cut Misty Moonlight cardstock to 5-1/2" x 8-1/2". Score at 4-1/4" along 8-1/2" side. Cut World of Good paper to 3-1/2" x 2". Cut Very Vanilla cardstock to 4" x 5-1/4". Ink compass image with Crumb Cake ink. Stamp on Very Vanilla layer and then on patterned paper without re-inking.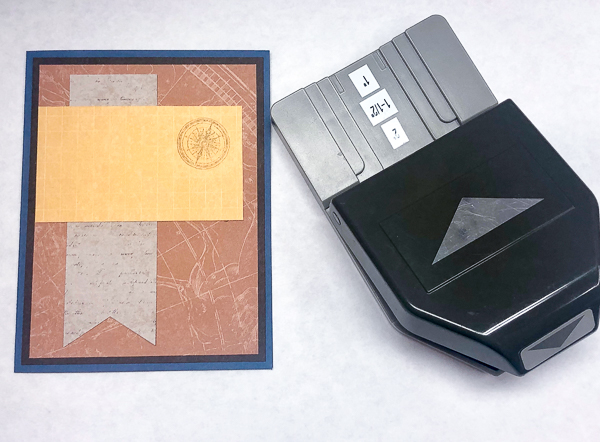 2. Add Layers
Cut Early Espresso cardstock to 4" x 5-1/4". Cut World of Good paper to 3-3/4" x 5". Cut 1-1/2" x 5" strip from World of Good Paper. Punch bottom with Triple Banner Punch. Adhere layers, banner, and stamped patterned paper to card front. Adhere stamped Very Vanilla layer inside card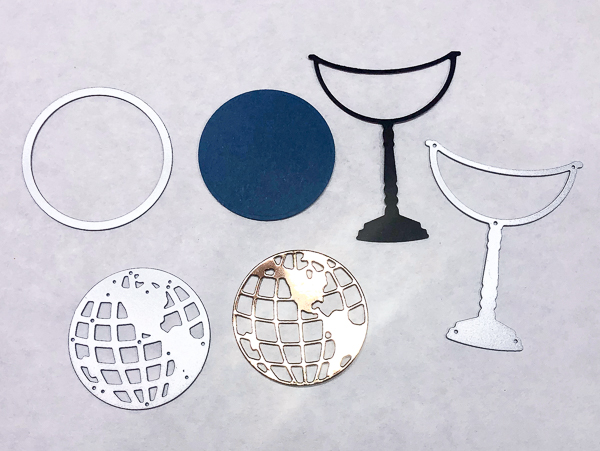 3. Die Cut
Use the World Map Dies to die cut the following. Cut scrap Misty Moonlight with the circle. Cut a globe from scrap Brass Foil. Cut the tall globe stand from scrap Early Espresso cardstock.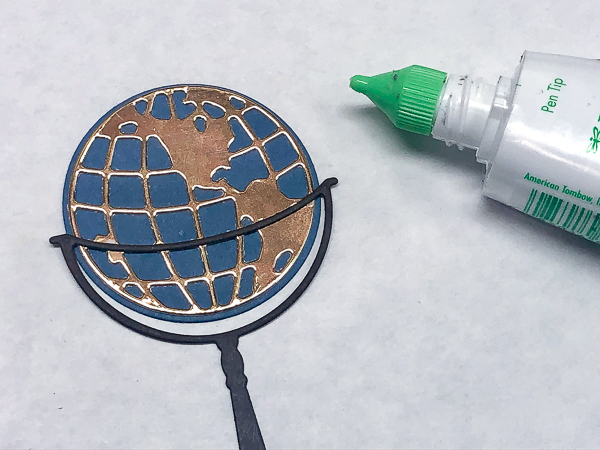 4. Adhere Die Cuts
Use Multipurpose Liquid Glue or Fine-Tip Glue Pen to add a very small amount of glue to the back of the foil globe. Adhere to Misty Moonlight circle. Add very small dots of liquid glue to the horizontal bar at the top of the globe stand and adhere carefully to the globe. Allow glue to dry.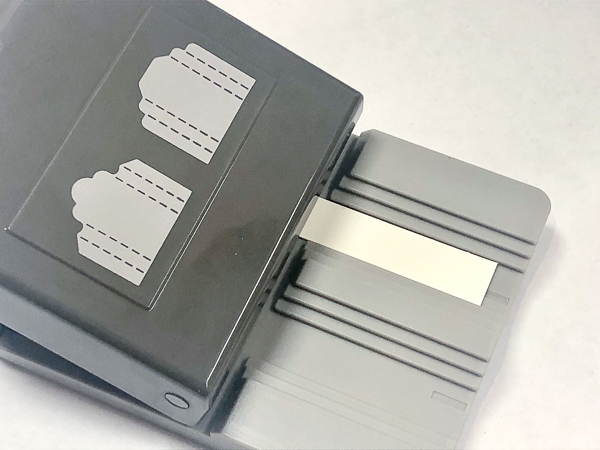 5. Pick A Punch
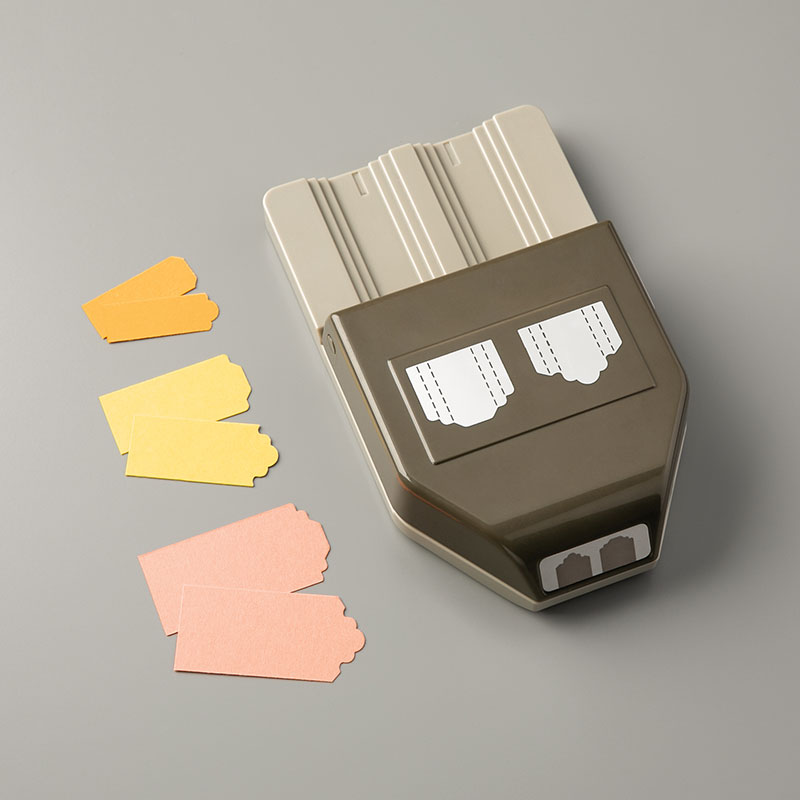
To centre a greeting evenly in the Pick a Label Punch you can measure the greeting, plus the space you want on each edge, and add 1/4". Then stamp greeting in the centre of the strip and punch each edge. Or get a really well centred greeting without measuring, by following these next steps.Cut a strip of Very Vanilla cardstock to 1/2" x 3-1/2". Slide one end into the narrowest groove of the square-tipped punch and punch.
 6. Stamp Greeting
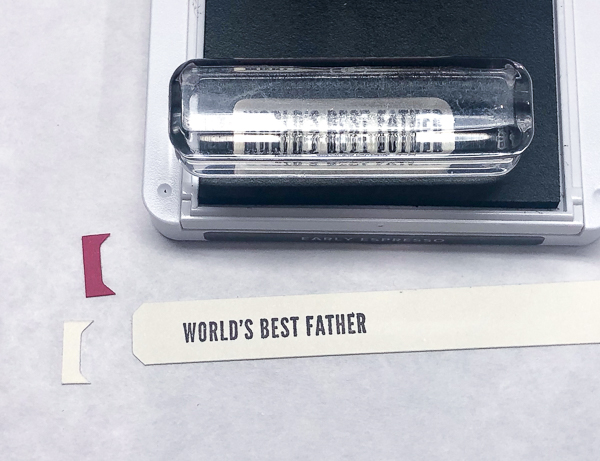
Remove punched label and pick up the little bracket sliver that was punched off the end to use in the next steps. Stamp greeting from Itty Bitty Greetings on the punched strip with Early Espresso ink. Leave almost 1/2" between the punched end and the greeting to leave space for an Enamel Dot.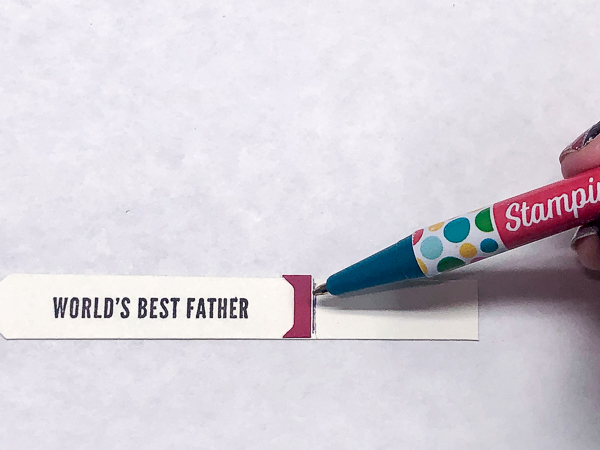 7. Measure Label
Take the little leftover punched sliver, I'm using red so it shows up better, and place it on the right edge of the greeting like a bracket. Move it so the spacing is even on each side of the greeting. Use a pencil to draw a line on your greeting strip at the strait edge of the bracket..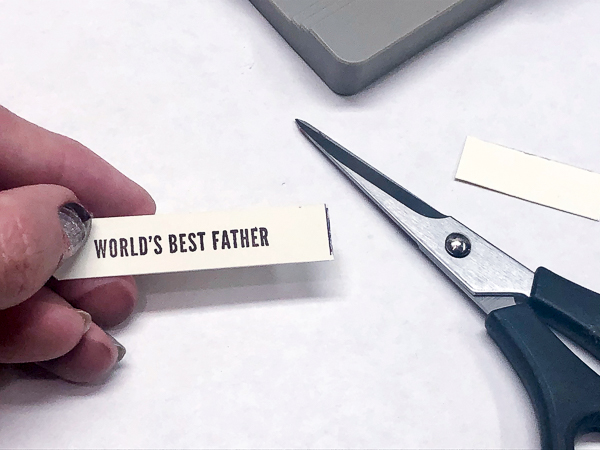 8. Cut Label
Use Paper Snips or Stampin' Trimmer to cut on the line 9. Punch Label Again
Place the un-punched end of the label back into the Pick a Punch groove. Slide it all the way into the punch, make sure it's straight in the groove, and punch. You'll have a nicely centred label.
10. Finish Card
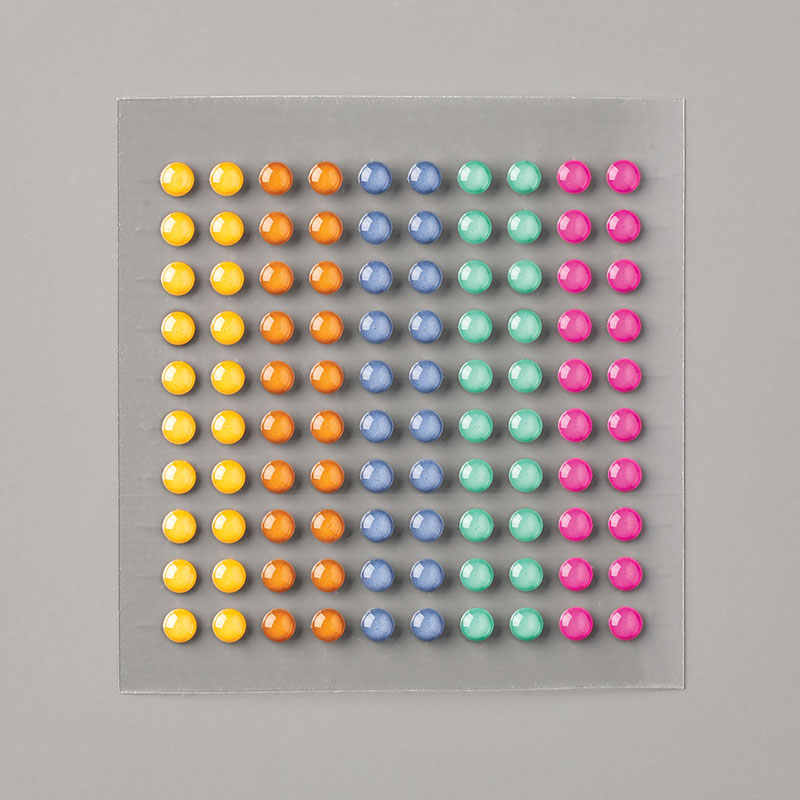
Adhere the globe and stand to the card with Mini Stampin' Dimensionals. Add In Color Enamel Dots to each end of the punched greeting. The spatula tip of the Take Your Pick Tool works great for these small, self-adhesive dots. Add greeting to card with Mini Stampin' Dimensionals.
SUPPLIES

CURRENT PROMOTIONS


Current Host Code
CLICK TO SHOP WITH HC

Free Newsletter!

Paper Pumpkin
SIGN ME UP!

Share With Friends
Most Recent Blog Posts
- FREE SHIPPING - DEC 14
- FREE SHIPPING from Oct 9th to 11th
- Stamp another Stack of Christmas Cards with Kevin & Christine
- Let the fun begin - again …
- Why wait? Join us now!
- Fitting Florets for any Occasion
- Festive Window Wishes
- Starter Kit + = No brainer!
- Perched in a Tree
- Awash in Beauty, so gorgeous!

.jpg)
.jpg)
.jpg)
.jpg)
.jpg)
.jpg)
.jpg)
.jpg)
.jpg)
.jpg)
.jpg)
.jpg)
.jpg)
.jpg)
.jpg)
.jpg)
.jpg)
.jpg)
.jpg)
.jpg)
.jpg)
.jpg)
.jpg)
.jpg)
.jpg)
.jpg)
.jpg)
.jpg)
.jpg)
.jpg)
.jpg)
.jpg)
.jpg)
.jpg)
.jpg)
.jpg)
.jpg)
.jpg)
.jpg)
.jpg)
.jpg)
.jpg)
.jpg)
.jpg)
.jpg)
.jpg)
.jpg)
.jpg)
.jpg)
.jpg)
.jpg)
.jpg)
.jpg)
.jpg)
.jpg)
.jpg)
.jpg)
.jpg)
.jpg)
.jpg)
.jpg)
.jpg)
.jpg)
.jpg)
.jpg)
.jpg)
.jpg)
.jpg)
.jpg)
.jpg)
.jpg)
.jpg)
.jpg)
.jpg)
.jpg)
.jpg)
.jpg)
.jpg)
.jpg)
.jpg)
.jpg)
.jpg)
.jpg)
.jpg)
.jpg)
.jpg)
.jpg)
.jpg)
.jpg)
.jpg)
.jpg)
.jpg)
.jpg)
.jpg)
.jpg)
.jpg)
.jpg)
.jpg)
.jpg)
.jpg)
.jpg)
.jpg)
.jpg)
.jpg)
.jpg)
.jpg)
.jpg)
.jpg)
.jpg)
.jpg)
.jpg)
.jpg)
.jpg)
.jpg)
.jpg)
.jpg)
.jpg)
.jpg)
.jpg)
.jpg)
.jpg)
.jpg)
.jpg)
.jpg)
.jpg)
.jpg)
.jpg)
.jpg)
.jpg)
.jpg)
.jpg)
.jpg)
.jpg)
.jpg)
.jpg)
.jpg)
.jpg)
.jpg)
.jpg)
.jpg)
.jpg)
.jpg)
.jpg)
.jpg)
.jpg)
.jpg)
.jpg)
.jpg)
.jpg)
.jpg)
.jpg)
.jpg)
.jpg)
.jpg)
.jpg)
.jpg)
.jpg)
.jpg)
.jpg)
.jpg)
.jpg)
.jpg)
.jpg)
.jpg)
.jpg)
.jpg)
.jpg)
.jpg)
.jpg)
.jpg)
.jpg)
.jpg)
.jpg)
.jpg)
.jpg)
.jpg)
.jpg)
.jpg)
.jpg)
.jpg)
.jpg)
.jpg)
.jpg)
.jpg)
.jpg)
.jpg)
.jpg)
.jpg)
.jpg)
.jpg)
.jpg)
.jpg)
.jpg)
.jpg)
.jpg)
.jpg)
.jpg)
.jpg)
.jpg)
.jpg)
.jpg)
.jpg)
.jpg)
.jpg)
.jpg)
.jpg)
.jpg)