 Hi, I'm Christine Alward and welcome to my website. I have been a demonstrator with Stampin' Up! since December 2009, and I love paper crafting and card making.
 I love to make people feel good and happy about their accomplishments, big or small, and I can never get enough of the smiles and pride I see on my customers' faces when they look at a finished project.
So many have told me that they have no creativity or talent when it comes to crafting, and all I would ask them is to give it a try and let me prove them wrong. Watching happy clients of all ages leave my classes with their finished cards and projects is what I like best about my job as independent Stampin' Up! demonstrator. I hope you will find inspiration in the projects I present here and that you will join me in my studio for a class.

Mini Tulip Basket - Free Tutorial

MINI SPRING TULIP BASKET
Add a little brightness to any day with this cheerful mini basket featuring the Timeless Tulips stamp and punch bundle. It's perfect for a sharing a little Easter treat, a sweet May Day surprise for your neighbours, or a little gift for Mom on Mother's day.
This basket design is simple to make and can be changed out for lots of different occasions or holidays by changing colours and stamps, so let's go create something lovely today!
 1.Cut& Score Basket
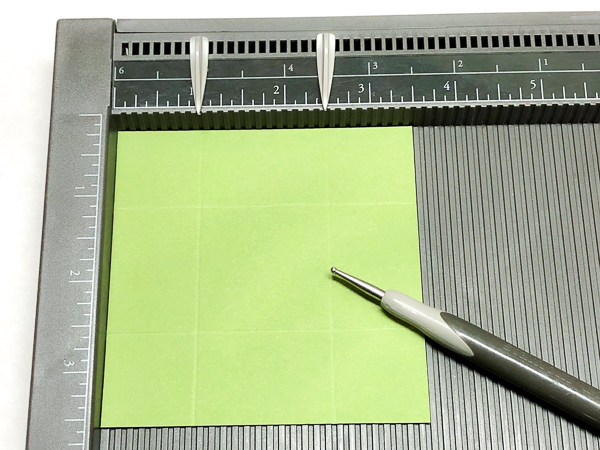
Cut Old Olive cardstock to 3-1/2" x 3-1/2". Score 1" in from each edge. The Simply Scored Scoring Tool works great. Place markers at 1" and 2-1/2" and score. Rotate cardstock and repeat to score the opposite edges.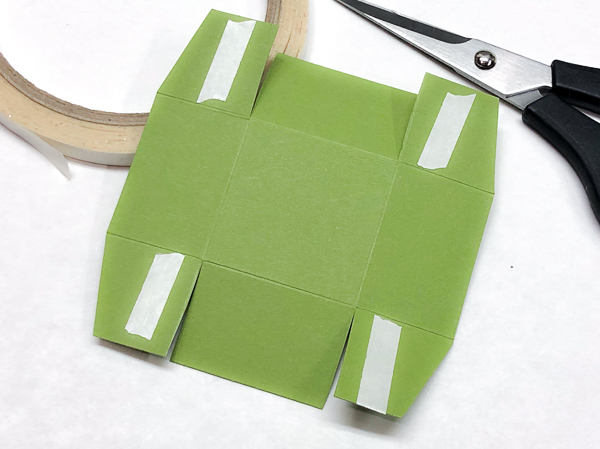 2. Cut Basket Flaps
On two opposite sides cut along the score lines from the edge of the cardstock to the first score line to create flaps for the basket. Trim a small triangular sliver off the outside of each flap. Add Tear & Tape to the flaps.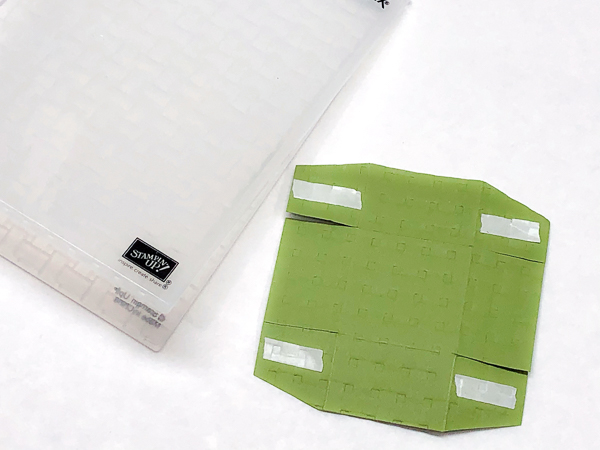 3. Emboss Basket
Fold along all score lines before embossing, as the score lines become harder to see after being embossed. Emboss the basket by placing it in the Basket Weave 3D Embossing Folder (#151797) with the side with the Tear & Tape face up towards the side of the folder with the Stampin' Up! logo.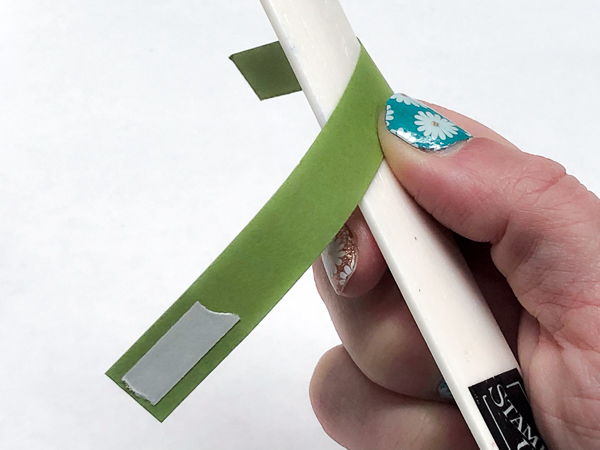 4. Basket Handle
Cut Old Olive cardstock to 1/2" x 5-1/2". Add slightly less than 1" of Tear & Tape to each end of the strip. Use a Bone Folder to gently bend the strip for the handle with the Tear & Tape on the outside of the curve.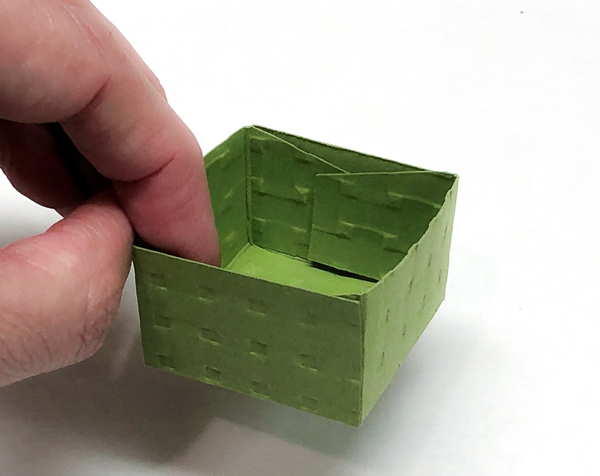 5. Assemble Basket
Remove Tear & Tape backing from basket and fold flaps in to assemble the body of the basket.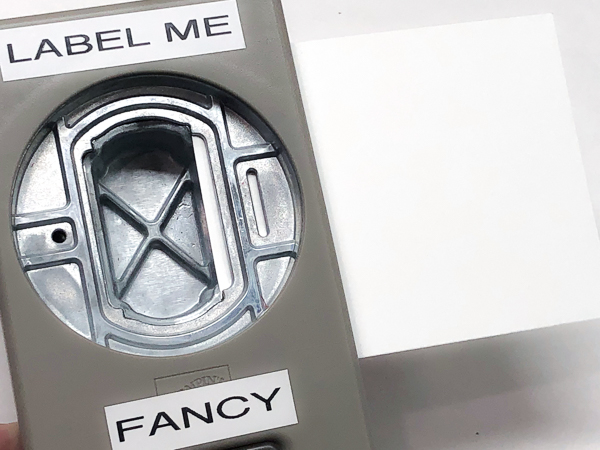 6. Label Me Fancy Punch
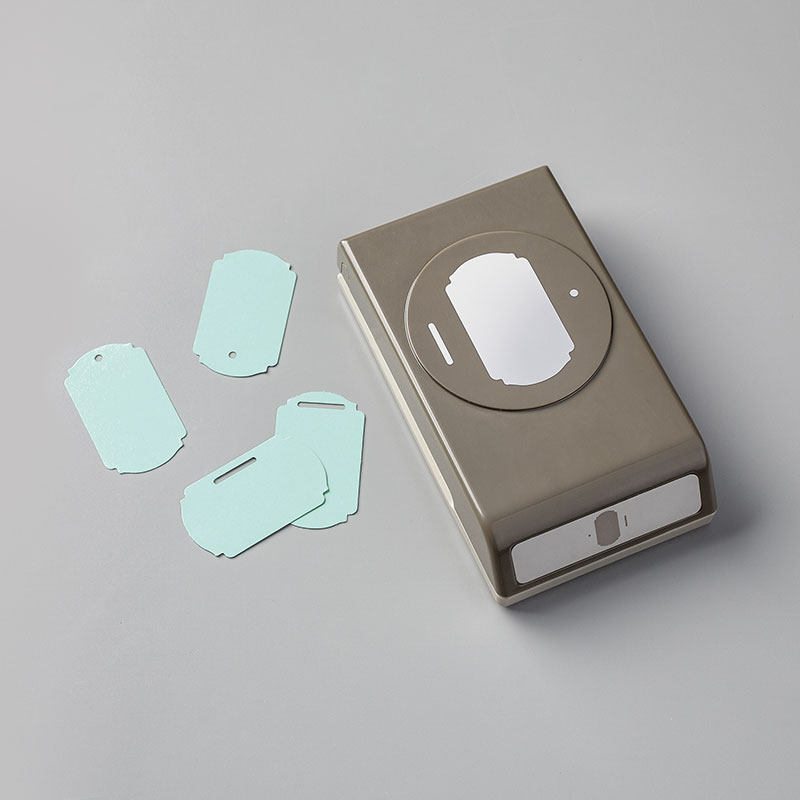
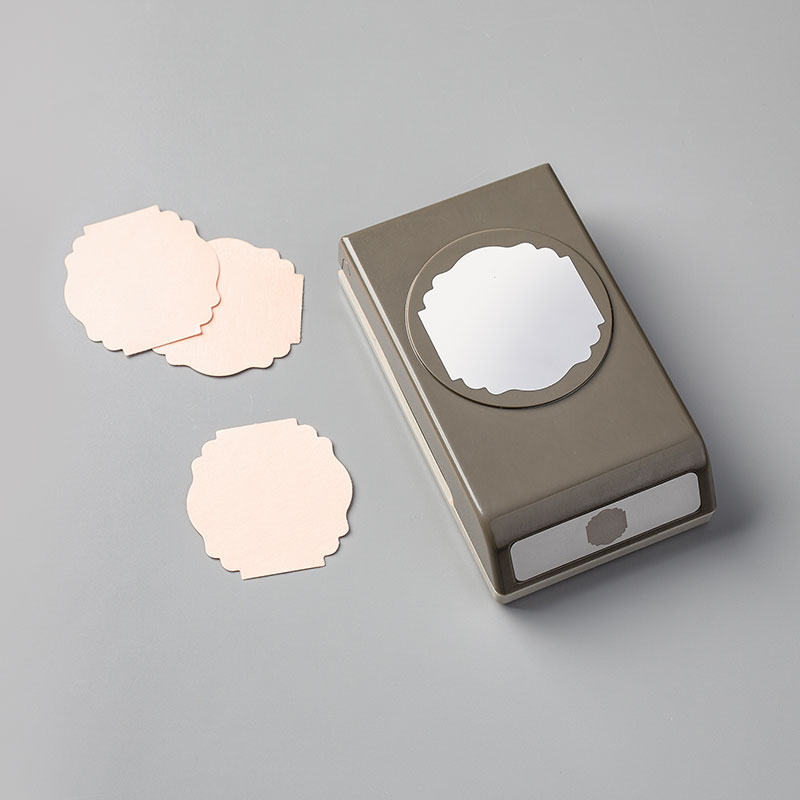
Hold the Label Me Fancy Punch upside down so you see the cutting area. Slide a scrap piece of Whisper White cardstock onto the edge of the punch where the slit punch is and punch.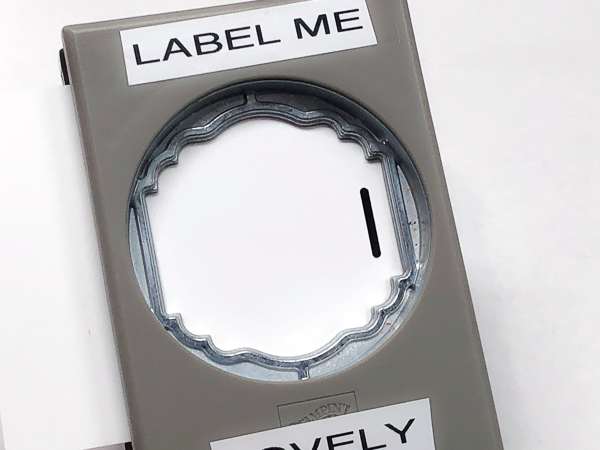 7. Label Me Lovely Punch
Hold the Label Me Lovely Punch upside down and slide the punched Whisper White cardstock into the punch. Center the punched slit near one flat edge and punch out. 8. Stamp Tag
Use the large tulip and a leaf stamp from the Timeless Tulip stamp set to stamp the tag. Ink the tulip with Poppy Parade ink the leaf with Old Olive. Stamp off both stamps once before stamping on the tag. Add a greeting with Old Olive ink without stamping off.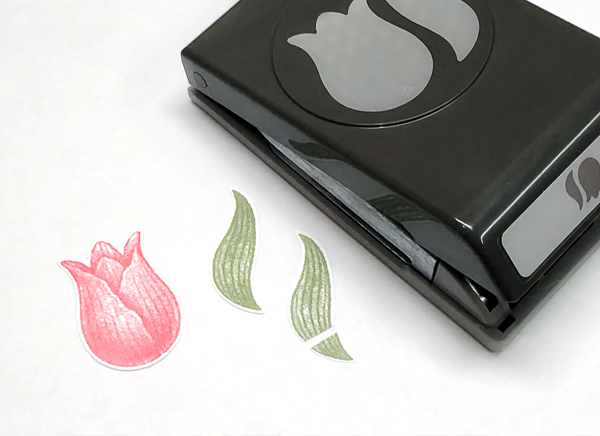 9. Stamp & Punch
Stamp large tulip on scrap Whisper White Cardstock with Poppy Parade ink. Leave space by the tulip and stamp the leaf stamp that matches the Tulip Builder Punch twice with Old Olive ink. Punch out tulip and leaves. Cut about 1/4" off the bottom of one leaf.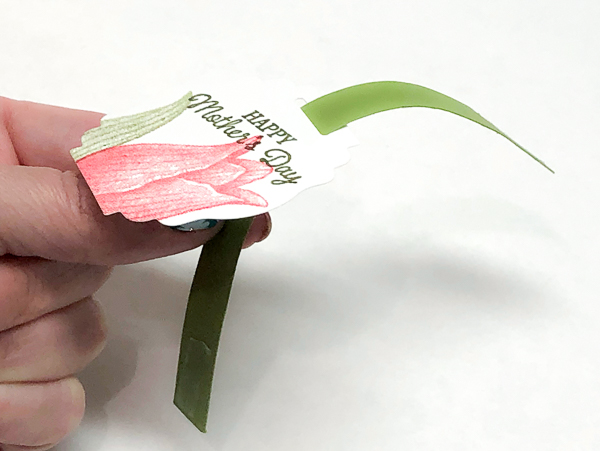 10. Add Tag & Handle
Slide one end of the handle strip down through the slit of the punched tag. The tag should sit so it's visible, not under the arch of the handle. Adhere the handle ends inside the basket with Tear & Tape.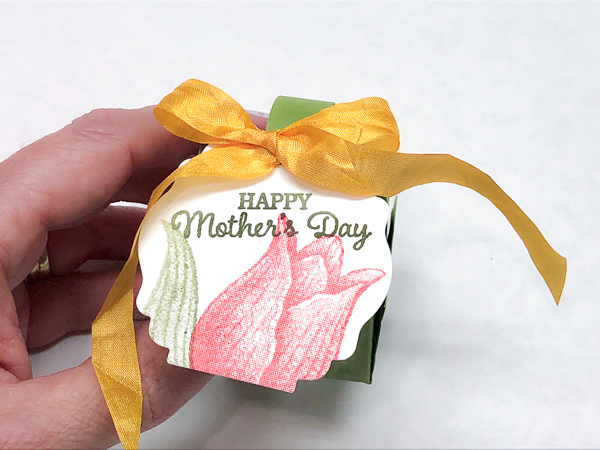 11. Ribbon Bow
Tie a bow around the handle of the basket using 15" of Crushed Curry 3/8" Crinkled Seam Binding Ribbon. Trim ribbon ends. Slide the tag up next to the bow and use a Glue Dot under the top of the tag to hold it in place on the handle.12. Add Tulip to Basket
Use Glue Dots to adhere the two punched leaves behind the punched tulip. Use Stampin' Dimensionals to adhere the tulip to the basket. Fill the basket with chocolates, jelly beans, or a small gift.
SUPPLIES


Current Host Code
YBTKQ4KZ
CLICK TO SHOP WITH HC
See here how to use a Host CodeCLICK TO SHOP WITH HC

Free Newsletter!

Paper Pumpkin
SIGN ME UP!

Share With Friends
Most Recent Blog Posts
- FREE SHIPPING - DEC 14
- FREE SHIPPING from Oct 9th to 11th
- Stamp another Stack of Christmas Cards with Kevin & Christine
- Let the fun begin - again …
- Why wait? Join us now!
- Fitting Florets for any Occasion
- Festive Window Wishes
- Starter Kit + = No brainer!
- Perched in a Tree
- Awash in Beauty, so gorgeous!

.jpg)
.jpg)
.jpg)
.jpg)
.jpg)
.jpg)
.jpg)
.jpg)
.jpg)
.jpg)
.jpg)
.jpg)
.jpg)
.jpg)
.jpg)
.jpg)
.jpg)
.jpg)
.jpg)
.jpg)
.jpg)
.jpg)
.jpg)
.jpg)
.jpg)
.jpg)
.jpg)
.jpg)
.jpg)
.jpg)
.jpg)
.jpg)
.jpg)
.jpg)
.jpg)
.jpg)
.jpg)
.jpg)
.jpg)
.jpg)
.jpg)
.jpg)
.jpg)
.jpg)
.jpg)
.jpg)
.jpg)
.jpg)
.jpg)
.jpg)
.jpg)
.jpg)
.jpg)
.jpg)
.jpg)
.jpg)
.jpg)
.jpg)
.jpg)
.jpg)
.jpg)
.jpg)
.jpg)
.jpg)
.jpg)
.jpg)
.jpg)
.jpg)
.jpg)
.jpg)
.jpg)
.jpg)
.jpg)
.jpg)
.jpg)
.jpg)
.jpg)
.jpg)
.jpg)
.jpg)
.jpg)
.jpg)
.jpg)
.jpg)
.jpg)
.jpg)
.jpg)
.jpg)
.jpg)
.jpg)
.jpg)
.jpg)
.jpg)
.jpg)
.jpg)
.jpg)
.jpg)
.jpg)
.jpg)
.jpg)
.jpg)
.jpg)
.jpg)
.jpg)
.jpg)
.jpg)
.jpg)
.jpg)
.jpg)
.jpg)
.jpg)
.jpg)
.jpg)
.jpg)
.jpg)
.jpg)
.jpg)
.jpg)
.jpg)
.jpg)
.jpg)
.jpg)
.jpg)
.jpg)
.jpg)
.jpg)
.jpg)
.jpg)
.jpg)
.jpg)
.jpg)
.jpg)
.jpg)
.jpg)
.jpg)
.jpg)
.jpg)
.jpg)
.jpg)
.jpg)
.jpg)
.jpg)
.jpg)
.jpg)
.jpg)
.jpg)
.jpg)
.jpg)
.jpg)
.jpg)
.jpg)
.jpg)
.jpg)
.jpg)
.jpg)
.jpg)
.jpg)
.jpg)
.jpg)
.jpg)
.jpg)
.jpg)
.jpg)
.jpg)
.jpg)
.jpg)
.jpg)
.jpg)
.jpg)
.jpg)
.jpg)
.jpg)
.jpg)
.jpg)
.jpg)
.jpg)
.jpg)
.jpg)
.jpg)
.jpg)
.jpg)
.jpg)
.jpg)
.jpg)
.jpg)
.jpg)
.jpg)
.jpg)
.jpg)
.jpg)
.jpg)
.jpg)
.jpg)
.jpg)
.jpg)
.jpg)
.jpg)
.jpg)
.jpg)
.jpg)
.jpg)
.jpg)
.jpg)
.jpg)
.jpg)
.jpg)
.jpg)